Paper bird crafts for preschoolers
How to make paper blue tits and robins with your 4 to 6 year-olds
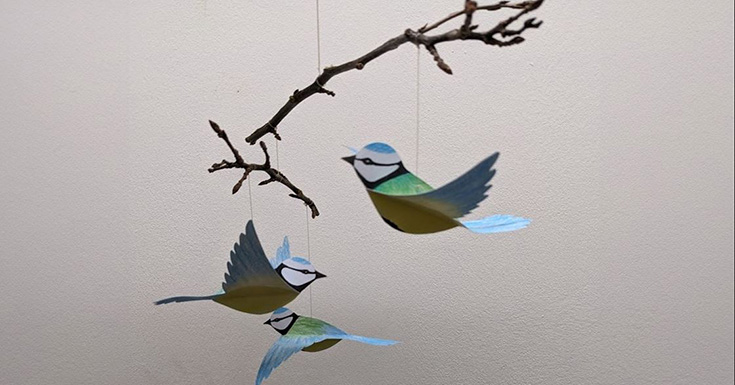
| March 2024One of the most common birds in late winter and early spring, blue tits are sure to catch the eye when you are out and about these days. Now you can make your own! The following craft project is perfect for preschool children (4–6 yrs) with a little support from the adults in the room.
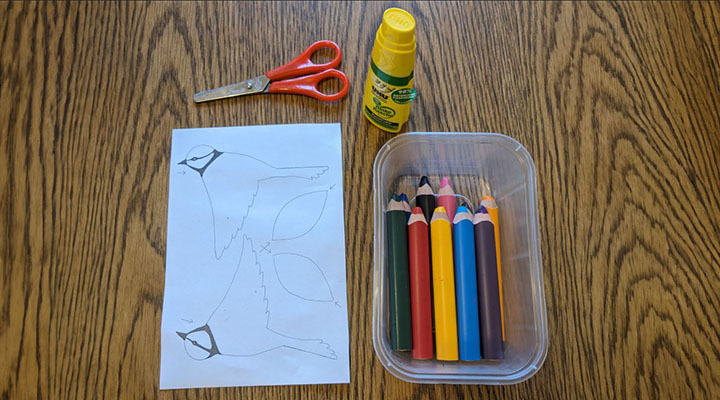
You will need:
- Blue tits pattern (alternative: robin pattern)
- Coloured pencils
- Scissors
- Glue
- Ruler
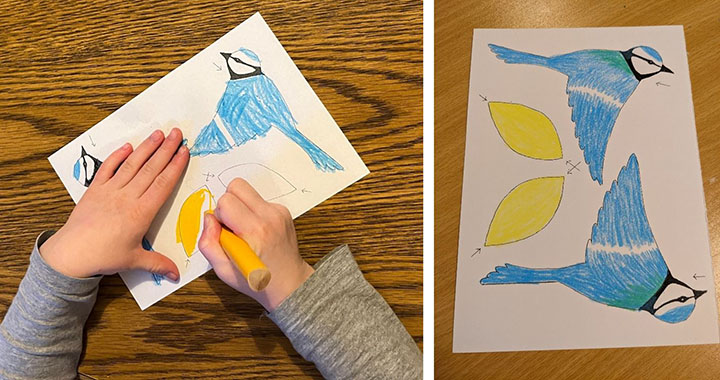
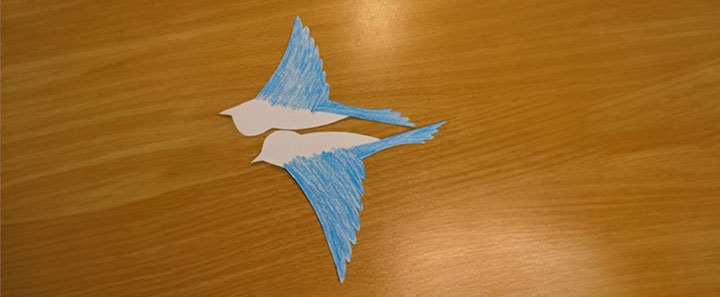
Start by downloading and printing out the pattern here. Make sure to use thick white (160 g) A4 paper. This pattern is for two blue tits, so start by cutting the sheet in half. Each bird has a left and right upper-body drawing, and two identical tummy pieces.
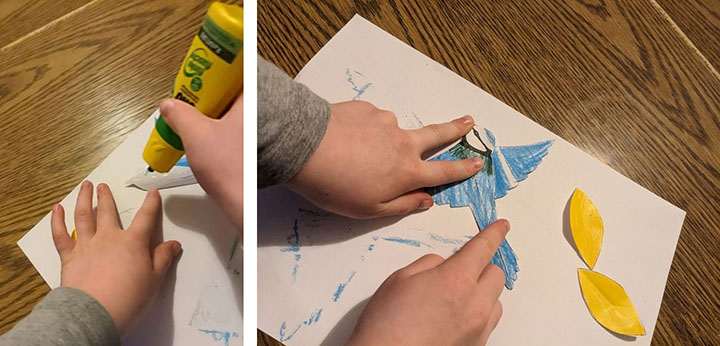
Look up and print out an image or images of blue tits so the children can see how to colour in the birds. They can colour it as simple or as detailed as they manage. (Do not cut out the pieces until after they are coloured and scored.)
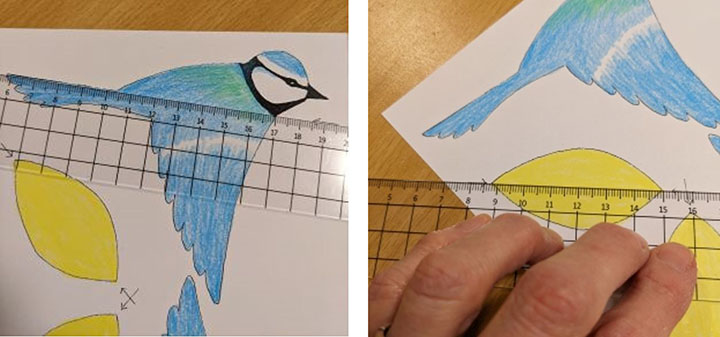
After the colouring is done, use a ruler and a sharp point (I used my open scissor blade) to score the places marked:
- from the arrow pointing to the neck, to the straight line on the top of the tail
- the yellow tummy parts, point to point
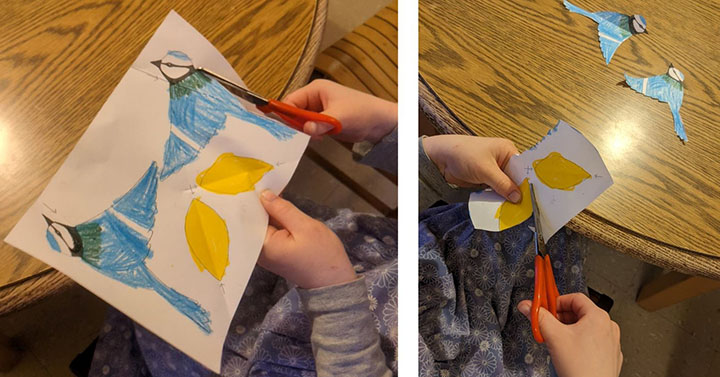
Cut out all the parts. Then fold on the scored lines.
Next, colour the undersides of the wings and tail only (no need to colour head or tummy parts).
Fold the wings out so the two white parts match together. Apply glue to one side of the uncoloured head/body; then with wings spread flat on table put the two head/body parts together and press to allow the glue to bond.
If your two pieces aren’t perfectly matching, neither was mine. Just trim it with scissors.
Next, fold the two yellow tummy pieces, put glue on one face of the white part, and match the correct ends of the other piece (one end is slenderer than the other).
Next, glue the tummy onto the upper body, matching the two centers. The slenderer end is the tail end.
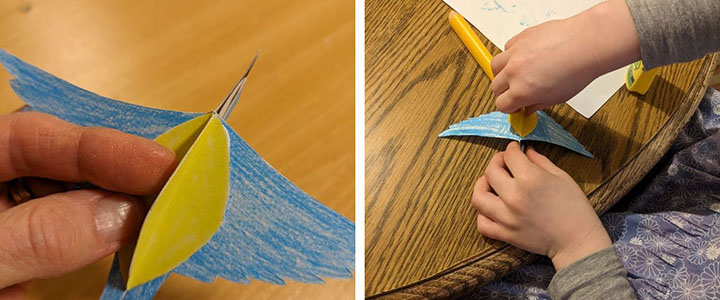
Using your colored pencil, you can give a little curl to the wings to give it character.

Take a moment to appreciate what you have made! Each child’s bird will be unique, just like in the natural world. But better put a string on him before he flies away! Using a needle with a knotted thread, you can make your bird either fly up, down or straight ahead depending on where you place the string (a lesson in physics—balance points!) It’s fun to have different positions—you can have wings either folded up or down or flat.
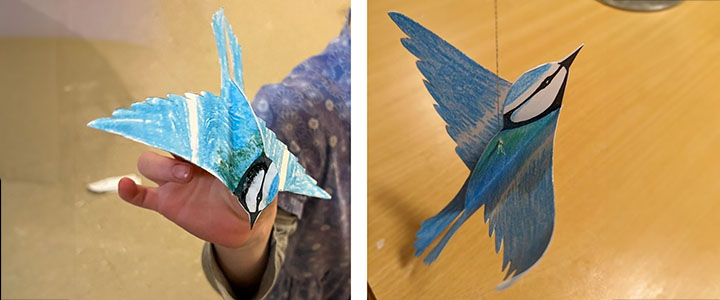
Enjoy hanging individual birds around your room, on branches, or make a mobile with multiple birds.
Have fun!


