More paint, less pressure
Simple ways to honour freedom of expression in early years art
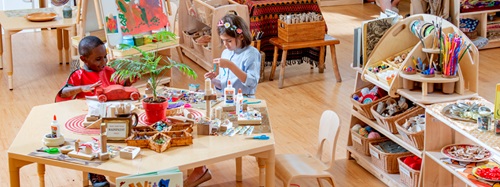
| January 2026The joy of art isn’t in the outcome – it’s in the moment of making it. Art in the early years doesn’t need to be complicated. It’s about giving children the freedom to enjoy the process, to explore materials, and to express themselves. I’m Pauline Harrison, and after more than thirty years of teaching art to young children, I’ve discovered that the most meaningful art moments are often the simplest ones.

It’s all about the process
We all know it, but it’s easy to forget: art in the early years is always about the process, not the product. The first thing to remember is that you don’t always need to send something home. Sometimes the most meaningful creations are the ones that simply stay in the child’s personal tray, or on the classroom wall – even if they don’t look like anything in particular.
Also, children’s artwork doesn’t have to be cut into the shape of a butterfly or made to look neat and tidy. What matters most is that the child was happy experimenting with this particular piece of artwork, and was having fun.
Avoid showing children how to make something (“Here’s how you draw a snowman: three circles and a carrot for the nose”). Instead, let them discover shapes, colours, and ideas for themselves. Their art will be more personal. When children create freely, they’re not just painting pictures – they’re painting their thoughts, feelings, and their growing understanding of the world. You may not end up with fifteen perfect snowmen for your display, but you will get a gallery of imagination.
Painting with joy
Painting with young children should be a joyful, low-pressure experience – for both you and them. The goal isn’t perfection, it’s discovery.
Paint often
Keep an easel set up as much as possible, and don’t let the thought of extra cleanup stop you from letting the children paint freely. You’ll find it’s easier to establish a quick set-up and tidy-up routine when painting becomes a regular activity rather than an occasional treat.
When I want a painting session with minimal clean up, something I can pull out at any time, I go for the tempera paint blocks at the table. The very young children can scrub away at them with an old brush, and not destroy them.

A painting by a two-year-old using hard tempera blocks.
As the children turn three or four, you can give them soft temperas or poster paints. These provide intense, vibrant colours which require only a stroke of the wetted brush to activate. You have to teach the children not to scrub them at this stage, but that is a valuable lesson for future art endeavors. And your efforts will be rewarded by the children’s delight in the colours and shapes they can make.

Painting by a four-year-old using soft tempera blocks.
Keep it relaxed
Let painting time feel easy and happy. If a child covers their entire page in black – wonderful! Don’t try to intervene with suggested colours to add: they’ve explored contrast and probably had fun doing it!
Avoid asking “What is it?”
Children shouldn’t feel pressured to explain their art. Try instead, “Tell me about your picture.” This small change respects their process.
A fun painting activity to try
Here’s a creative way to explore colour mixing with poster paints – perfect for a relaxed afternoon of art and discovery. You’ll need a set of paint dishes, some thick brushes, and poster paints.
Provide each child with a paint dish, and start with white paint in each dish. Next, add a small amount of another colour to the dish, ensuring variety among the children. Then let them mix the colour into the white paint, and start painting!
Encourage the children to notice what happens when the colour is added to the white: “Ooh, it makes pink! Mint green! Peach!” After a while, swap the lids around so everyone gets to try a new shade. Keep painting and swapping, then add a third colour to each lid – watch as tones deepen into greens, purples, aquas, and eventually, rich browns and greys.
When you’re finished, step back and admire the papers covered in mixed colours. It’s messy, joyful, and full of learning – just the way painting should be.

Scribbling is beautiful
Scribbling is where creativity begins. Let children explore it with any medium for as long as they’re interested – this is the foundation of drawing and writing. Celebrate their efforts: “Look how the colours blend together!” or “You made orange by mixing red and yellow!”
Offer different materials and surfaces to spark curiosity. Try white crayon with a food colour wash, and watch the white crayon marks magically appear! Use coloured paper with chalk, or dip cotton swabs into food colour for a transparent medium. Remember that pressing hard with crayons can be tiring for little hands, so offer a mix of tools – fat markers, paintbrushes, chalks, or sponges. Every mark they make is fun, and scribbling is beautiful!

Make a mural
Large group projects are a wonderful way to bring art and teamwork together. Lay out a long sheet of white paper on the floor – just not so big that it overwhelms the children. Squeeze out poster paint where the sun might be: start with yellows and a touch of red. A couple of children can paint that area. Then add blues and whites for the sky, and yellows and blues and browns for grass and earth. Enjoy their excitement as they mix different greens! (Try not to tell them to mix yellow and blue together to make the grass, let them discover it themselves.)
Let children use brushes or sponges to spread and blend the colours. They’ll quickly discover how new shades appear as they mix directly on the paper.
If space allows, let the mural dry and continue the next day. This time, invite them to add trees, animals, or whatever the scene inspires. Remind the children that trees grow up from the ground and that branches can twist and curve – but if their trees are just a few wobbly lines, that’s perfectly fine too!
Hang the finished mural in your classroom. It will be beautiful in its own childlike way!
Conclusion
An open-ended, free approach to art is the best preparation for school and for life. Young children spend much of their day following adult instructions, so keep direction to a minimum when it comes to art. Give them space to explore and experiment; childhood is built on these moments of freedom and delight!